The Mac has plenty of games, but it'll always get the short end of the stick compared to Windows. If you want to play the latest games on your Mac, you have no choice but to install Windows .. or do you?
- Jul 05, 2017 Virtual Machines: Virtual machines are often the ideal way to run Windows desktop applications on your Mac, as you can run them on your Mac desktop. If you have Windows programs you need to use — perhaps a program you need for work — a virtual machine is very convenient. However, virtual machines add overhead.
- Chromebooks can access Windows apps, and in fact can run Windows proper - after a fashion. (Pro tip: This works with Mac and Linux systems as well, but for purposes of this tutorial, the focus is.
There are a few ways you can play Windows games on your Mac without having to dedicate a partition to Boot Camp or giving away vast amounts of hard drive space to a virtual machine app like VMWare Fusion or Parallels Desktop. Here are a few other options for playing Windows games on your Mac without the hassle or expense of having to install Windows.
GeForce Now
PC gaming on Mac? Yes you can, thanks to Nvidia's GeForce Now. The service allows users to play PC games from Steam or Battle.net on macOS devices. Better still, the graphic power of these games resides on Nvidia's servers. The biggest drawback: the service remains in beta, and there's been no announcement when the first full release is coming or what a monthly subscription will cost.
For now, at least, the service is free to try and enjoy. All supported GeForce NOW titles work on Macs, and yes, there are plenty of them already available!
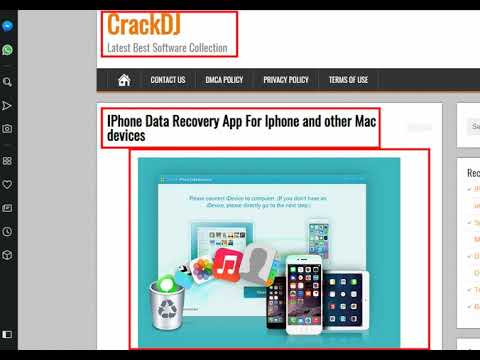
Natively, Windows PC do not even 'see' APFS and HFS+ formatted partitions. You could convert the drive to FAT32 or exFAT that both Mac and Windows can read. However, this is impossible if the HFS+ or APFS has over 1T data. What should you do? Here is a tutorial help you read Mac drive on Windows.
The Wine Project
The Mac isn't the only computer whose users have wanted to run software designed for Windows. More than 20 years ago, a project was started to enable Windows software to work on POSIX-compliant operating systems like Linux. It's called The Wine Project, and the effort continues to this day. OS X is POSIX-compliant, too (it's Unix underneath all of Apple's gleam, after all), so Wine will run on the Mac also.
Wine is a recursive acronym that stands for Wine Is Not an Emulator. It's been around the Unix world for a very long time, and because OS X is a Unix-based operating system, it works on the Mac too.
As the name suggests, Wine isn't an emulator. The easiest way to think about it is as a compatibility layer that translates Windows Application Programming Interface (API) calls into something that the Mac can understand. So when a game says 'draw a square on the screen,' the Mac does what it's told.
You can use straight-up Wine if you're technically minded. It isn't for the faint of heart, although there are instructions online, and some kind souls have set up tutorials, which you can find using Google. Wine doesn't work with all games, so your best bet is for you to start searching for which games you'd like to play and whether anyone has instructions to get it working on the Mac using Wine.
Note: At the time of this writing, The Wine Project does not support macOS 10.15 Catalina.
CrossOver Mac
CodeWeavers took some of the sting out of Wine by making a Wine-derived app called CrossOver Mac. CrossOver Mac is Wine with specialized Mac support. Like Wine, it's a Windows compatibility layer for the Mac that enables some games to run.
CodeWeavers has modified the source code to Wine, made some improvements to configuration to make it easier, and provided support for their product, so you shouldn't be out in the cold if you have trouble getting things to run.
My experience with CrossOver — like Wine — is somewhat hit or miss. Its list of actual supported games is pretty small. Many other unsupported games do, in fact work — the CrossOver community has many notes about what to do or how to get them to work, which are referenced by the installation program. Still, if you're more comfortable with an app that's supported by a company, CrossOver may be worth a try. What's more, a free trial is available for download, so you won't be on the hook to pay anything to give it a shot.
Boxer
If you're an old-school gamer and have a hankering to play DOS-based PC games on your Mac, you may have good luck with Boxer. Boxer is a straight-up emulator designed especially for the Mac, which makes it possible to run DOS games without having to do any configuring, installing extra software, or messing around in the Mac Terminal app.
With Boxer, you can drag and drop CD-ROMs (or disk images) from the DOS games you'd like to play. It also wraps them into self-contained 'game boxes' to make them easy to play in the future and gives you a clean interface to find the games you have installed.
Boxer is built using DOSBox, a DOS emulation project that gets a lot of use over at GOG.com, a commercial game download service that houses hundreds of older PC games that work with the Mac. So if you've ever downloaded a GOG.com game that works using DOSBox, you'll have a basic idea of what to expect.
Some final thoughts
In the end, programs like the ones listed above aren't the most reliable way to play Windows games on your Mac, but they do give you an option.
Of course, another option is to run Windows on your Mac, via BootCamp or a virtual machine, which takes a little know-how and a lot of memory space on your Mac's hard drive.

How do you play your Windows games on Mac?
Let us know in the comment below!
Updated October 2019: Updated with the best options.
We may earn a commission for purchases using our links. Learn more.
My heartThis timelapse of macOS 10.0 through 10.15 is a nostalgic wonder
The very first version of macOS, or Mac OS X as it was known, arrived almost 20 years ago. This video takes us through every major update the Mac has seen since in one amazing timelapse.
Sometimes the lines between macOS and Windows 10 seem like a war zone of proponents from either side arguing about graphics, user interface, and program availability. But what if you just want the best of both worlds?
As many of us know, it’s the little things that make us wish we could switch back and forth between the two operating systems. Whether it’s that one program you need for work or your favorite video game that isn’t cross-platform compatible, it’s high time you find a way to be able to continue using your gorgeous MacBook Pro without making sacrifices around the edges.
Can I run Windows 10 on My MacBook Pro?
The short answer to this question is yes, you certainly can.
The longer version? To do so, you’re going to need to spend a fair amount of time setting this up and deciding which method of doing so is most effective for you.
Also, no option is going to be seamless – you will probably lose some performance power due to the way built-in optimization software works.
Is Windows 10 free for Mac?
Unfortunately, if you want to run Windows 10 on your Mac, you’ll need to purchase a license from Microsoft.
If you’ve used a PC in the past, you may not be familiar with this since Windows tends to come preinstalled. But in the same way, as if you were building your computer from the ground up or if you were updating an extremely outdated laptop, you’ll need to buy a copy of Windows 10.
This can be done electronically from the Microsoft Store here, where you’ll receive a product key and download, or you can choose to receive a copy via physical USB. Windows 10 Home starts at about $120, and the Pro version costs about $200. However, both are still cheaper than trying to buy an entirely new computer just to run a few of your favorite things.
Running Windows 10 on MacBook Pro
Once you have a copy of Windows 10 in your possession, it’s time to pick a method for installation. There are two main ways to do this: creating a partition on your Mac with the built-in Boot Camp program or using a third-party virtual machine that creates a tiny version of the Windows OS on top of the normal Mac system. We’ll guide you through both of these.
Method 1: Boot Camp
Bootcamp is preinstalled on your Mac, but most people use their MacBook without ever realizing it’s there. To find it, simply search in Spotlight for “Bootcamp”, and it should come up right away.
When you use BootCamp, your Mac’s hard drive will be split into two sections- one running Windows, and one running macOS. These means that they operate in completely separate spheres and cannot interact with each other. Additionally, the size of the partition you create cannot be changed unless you perform a fresh install to reset it.
Pros:
- Already built into Mac, so it’s the safest and easiest option to run Windows.
- You’ll experience the least performance loss.
- It will feel like you’re running a completely new computer.
Cons:
- Not that convenient because your MacBook must be rebooted to switch between Windows 10 and macOS.
- Partition size is semi-permanent, and cannot be resized without some considerable effort to re-install and repartition.
- Transferring files between the two systems is like transferring between two totally separate computers- you’ll need to share them by flash drive (see the best usb-c drive for MacBook Pro), email, or some other method that isn’t just drag-and-drop.
Using BootCamp
Create link to app from onenote on a mac. To create a new notebook in OneNote, click the list of notebooks already in OneNote and then click 'Add Notebook.' OneNote creates your first notebook for you automatically when you set up the.
To use BootCamp, you’ll need to follow a few basic steps:
- Obtain a copy of Windows 10 (as previously mentioned)
- Make sure your entire MacBook is up to date by checking for any software updates
- Open BootCamp from Spotlight
- Partition your hard drive
- Install Windows & Windows Drivers
- Choose which OS to run and get started!
For a more detailed version of this overview, you’ll want to check out PCMag’s BootCamp walkthrough or head for the official Apple Guide.
Method 2: Virtual Machines
If the idea of rebooting your computer to switch OS doesn’t appeal to you, a virtual machine is always an option. These are ideal in situations where you only need one program or don’t plan on doing many taxing operations on Windows.
In a virtual machine, Windows 10 runs inside an application so it’s like having another computer, but confined inside a single window on your screen. This means you can work in both Mac and Windows at the same time but may suffer a bit from performance issues.
Pros:
- It’s much more convenient than rebooting your computer to use Windows.
- You can change the size of the partition whenever you want.
- You can use files between operating systems easily.
Cons:
- You’ll need to buy a software license for your virtualization machine in addition to a copy of Windows.
- You may notice some drop in performance than if you dual-boot.
When it comes to virtual machines, you have a few options, each with their own benefits and drawbacks.
Can I Make Windows Software Work On Mac Download
The most well-known programs are Parallels Desktop for Mac and VMWare Fusion, which provide almost identical functionality with a few minor differences (such as display resolution or Quick Look support) that won’t make or break your decision. They are priced at the same level for a single computer license and similar setup options. Fusion tends to outperform Parallels, but Parallels is a bit more user-friendly.
A third, lesser-known option is VirtualBox. This software is free, but it doesn’t come with the bells and whistles of its competitors. It doesn’t have the same optimization power or even offers a similar variety of setup options, and it tends to be on the techier side, making it difficult to use if you aren’t invested in learning how (you may be interested in this book: An Ultimate Guide Book on Virtualization with VirtualBox). But if you just need to try out virtualization, it’s a great place to start.
Using a Virtual Machine
To use a virtual machine, you’ll need to go through a similar amount of setup as Bootcamp, but the process varies more depending on which software you’ve chosen.
- Obtain a copy of Windows 10 (as mentioned above)
- Also, purchase a license for the software you have chosen
- Create a virtual machine. This process varies by program, but it’s the first thing you need to do before attempting to run any programs
- Install Windows to the Virtual Machine
How To Get Windows On Mac
If you’ve chosen to use Parallels, this guide includes images and should be sufficient to get through the installation process. For VMWare Fusion, their support page includes both a video and text-based tutorial for installation. Those who opt for VirtualBox can follow LifeHacker’s guide to setup since this program’s installation includes a plethora of personalization options you may not be sure what to do with.
Final Words
Running Windows on a MacBook Pro means you get to have your cake and eat it too. It’s a great compromise between systems that let you do the work you need to while sticking with the operating system you know best. While you may see some performance loss and it won’t be quite the same as having a computer completely dedicated to Windows, you do have a variety of options to work with what you’ve got.
How do you use Windows 10 on your Mac? Tell us about your experience by leaving a comment below.
